Introduction
Chatfood is an e-commerce solution for F&B entrepreneurs. It combines online ordering solution and integrations with advanced marketing tools and CRM
Chatfood provides the following main features:
- Instagram, WhatsApp, and Facebook ordering
- A dedicated online ordering mobile app and website for your store
- QR Menu & Table Ordering
- CRM & Analytics
The integration between Foodics and Chatfood will allow you to
- Sync menu from Foodics to Chatfood. This includes Categories, Modifiers, Modifier Options, and Products. Combos are not supported
- Receive orders from Chatfood directly in your Foodics Cashier
For more details or support on Chatfood:
- Website: https://www.chatfood.io/
- Email: hello@chatfood.io
- Contact Chatfood Form : https://www.chatfood.io/contact
Pre Requirements to Use Chatfood Integration
To enable this integration, you must first have an account in Chatfood. If you don't have an account already, you can sign up at Chatfood Sign up Page
-
You need to obtain some details from Chatfood to enable this integration. For each of your Foodics branches that you want to activate Chatfood for, please ask Chatfood team to provide the following to you
- Chatfood Outlet ID
- Chatfood Client ID
- Chatfood Client Secret
-
When Chatfood send orders to your Foodics account, these order may have delivery fee. Delivery fee is handled in Foodics through charges. Therefore, you need to create a charge that will be used in Chatfood integration. The charge that will be used with Chatfood integration must have the following details
- The charge must be attached to all branches in Foodics
- The charge type must be amount
- The charge should be
Open Value - The charge must have the order type
Deliveryadded to it
For more details on Foodics charges, you can read the Charges Overview Article
- The integration will sync your menu to Chatfood based on a single menu group that you will create in Foodics
This will allow you to add certain products to Chatfood menu through the menu group
For more details on menu groups and how you can create/update them, please visit Menu Group Overview
Enabling The Integration
- Log in to your Foodics console at console.foodics.com/login using the owner email, If you logged in with non owner user, you will not be able to activate the integration
- Click this link
- You will be taken to the integration settings page
Integration Settings Page
The integration settings page is where you can do the mapping and sync for menu, delivery charge, and branches
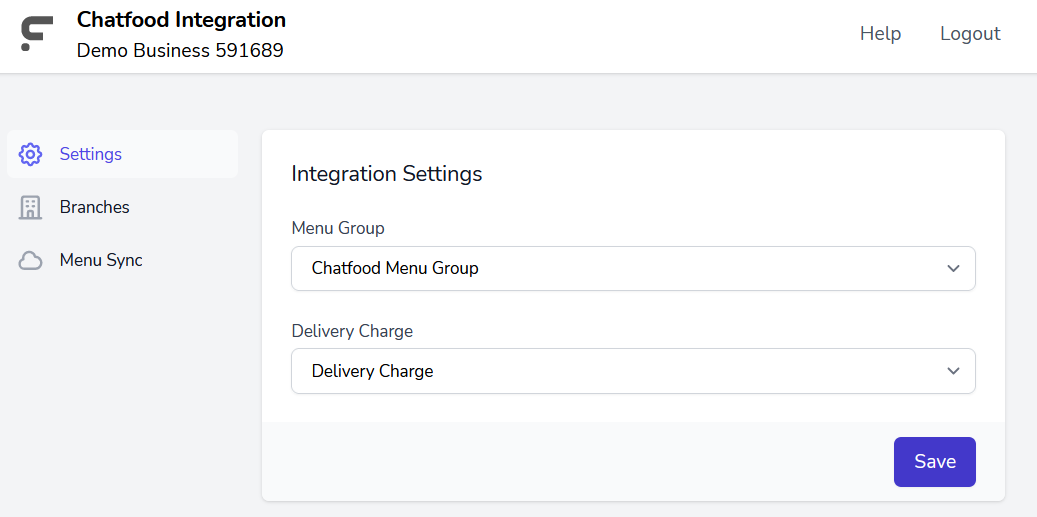
Settings Tab
The Settings tab allows you to define which Foodics menu group and delivery charge you want to use in Chatfood integration
- You have to select the Foodics Menu Group that will be used to create your menu inside Chatfood
- You have to select the Delivery Charge that will be used with Chatfood orders
Select from the dropdown menu, then click Save
If you don't see the charge in the drop down, make sure the charge has all needed details as explained in the Pre Requirements to Use Chatfood Integration section
Branches Tab
The Branches tab is where you will do the mapping between your Foodics branches and your Chatfood outlet
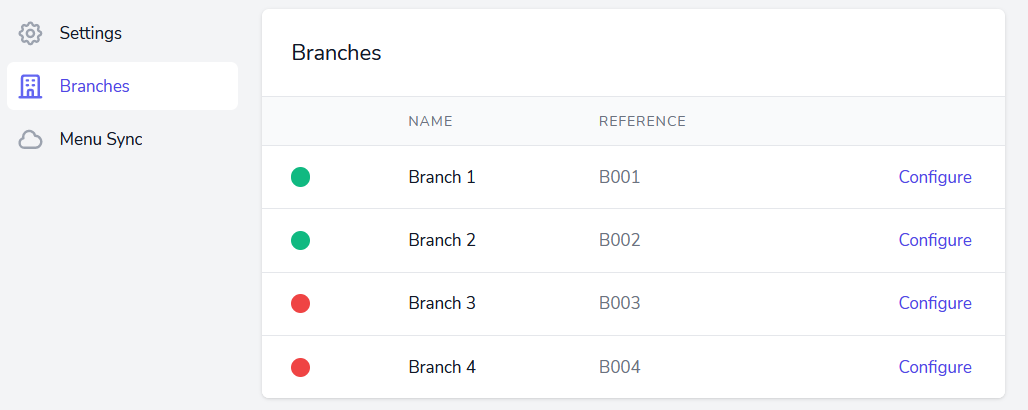
When you go the Branches tab, you will see a list of your Foodics branches, with a colored circle next to each branch
- If the circle is Red, means the branch is not configured and can't be used in the integration
- If the circle is Green, means the branch is configured and ready to be used in the integration
To configure a branch, click on Configure next to the branch
You will be taken to the branch configuration view as shown below
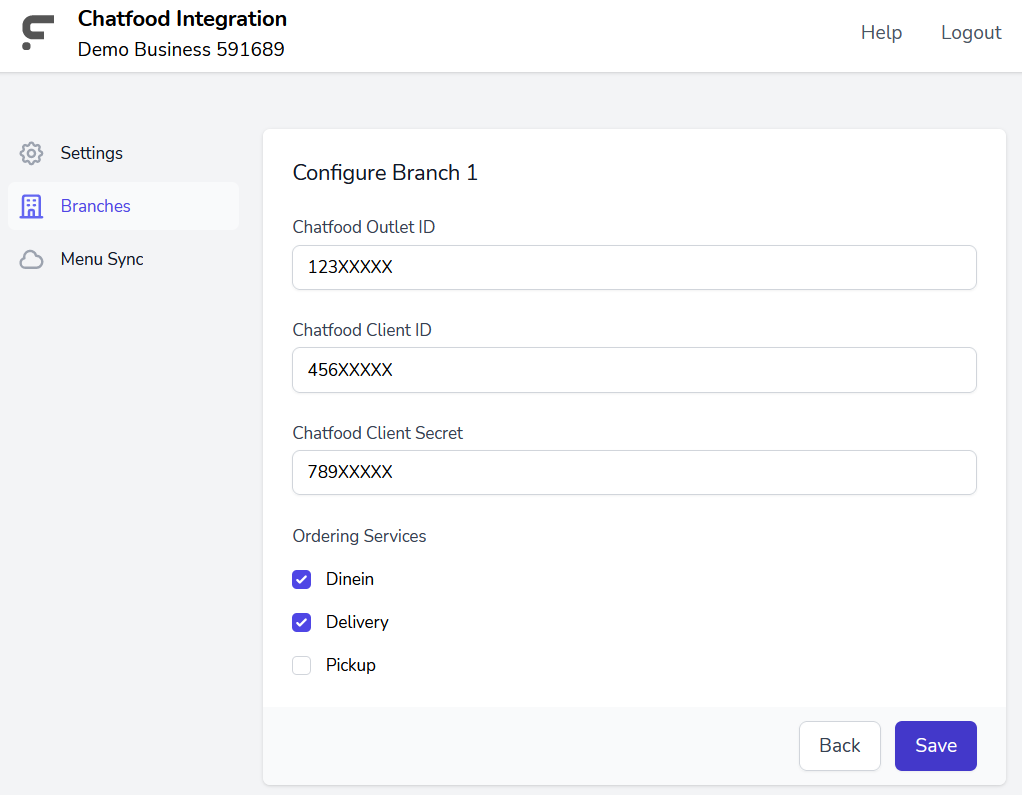
- Enter your Chatfood Outlet Id, Client Id, and Client Secret
- Select which ordering services you want to enable for this branch in Chatfood
- Click
Save
If the Client Id and Client Secret you provided are correct, the integration will show success message, if incorrect, will show an error message
Note that the integration doesn't validate Chatfood Outlet Id, but if you provided an invalid Chatfood Outlet Id, the integration for this branch will not work
Menu Sync Tab
The Menu Sync tab is where you will trigger the menu sync from Foodics to Chatfood
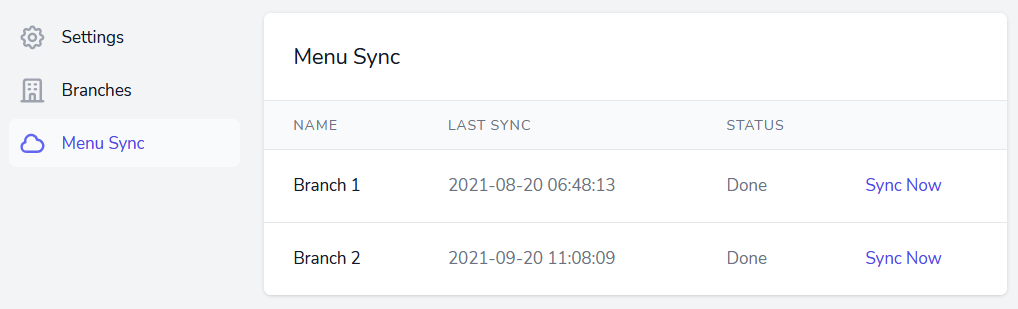
Whenever you want to sync your Foodics menu to Chatfood, you have to come to this page and do the sync
Any non configured branch will not appear in this page
- The menu sync time will differ based on your menu size in Foodics
- The status of the menu sync will appear in this page too, if sync is completed successfully, the status will be
Done, else, the status will beFailed - If sync status is
Failed, you can reach us at support@foodics.com to investigate
FAQ:
Q1: Chatfood is sending orders to my restaurant but I'm not receiving them in Foodics cashier application
A: Please check the below points
1- Sign in to your Foodics account at console.foodics.com/login, then go to Orders Page. This page will show you all API orders that are in Pending status
2- Is there any pending orders from Chatfood?
If Yes:
- Make sure you have implemented all needed steps to receive online order as explained in the Accept Online Orders Article
- In the cashier app, click
HOME-->Sync Data - Chatfood orders should be received in the cashier
If No:
- There is an issue either from Chatfood side or Foodics side. Reach Foodics support at support@foodics.com to investigate
Q2: Combos in my Foodics menu are not getting synced to Chatfood
A: The integration doesn't support syncing combos
Q3: Does the integration work with Tax Exclusive accounts
A: No, the integration only supports tax inclusive pricing.